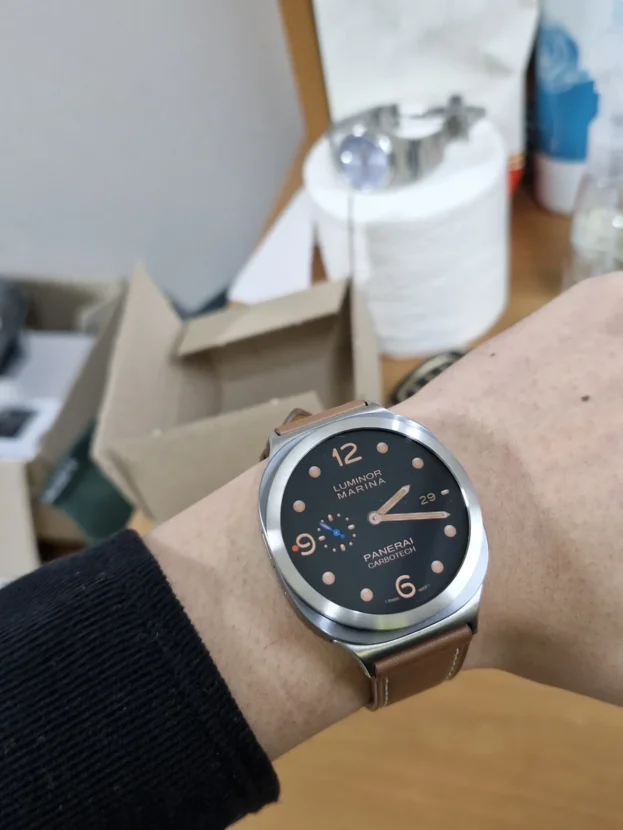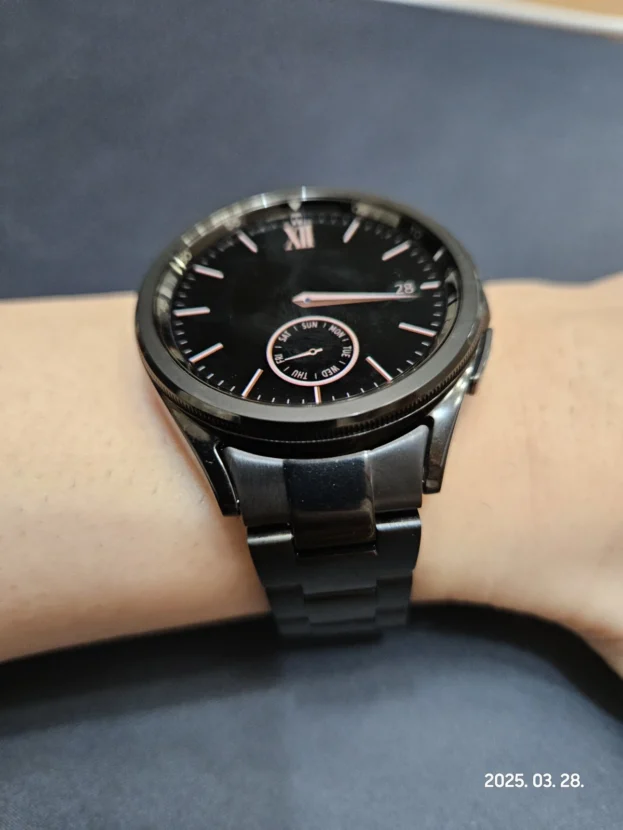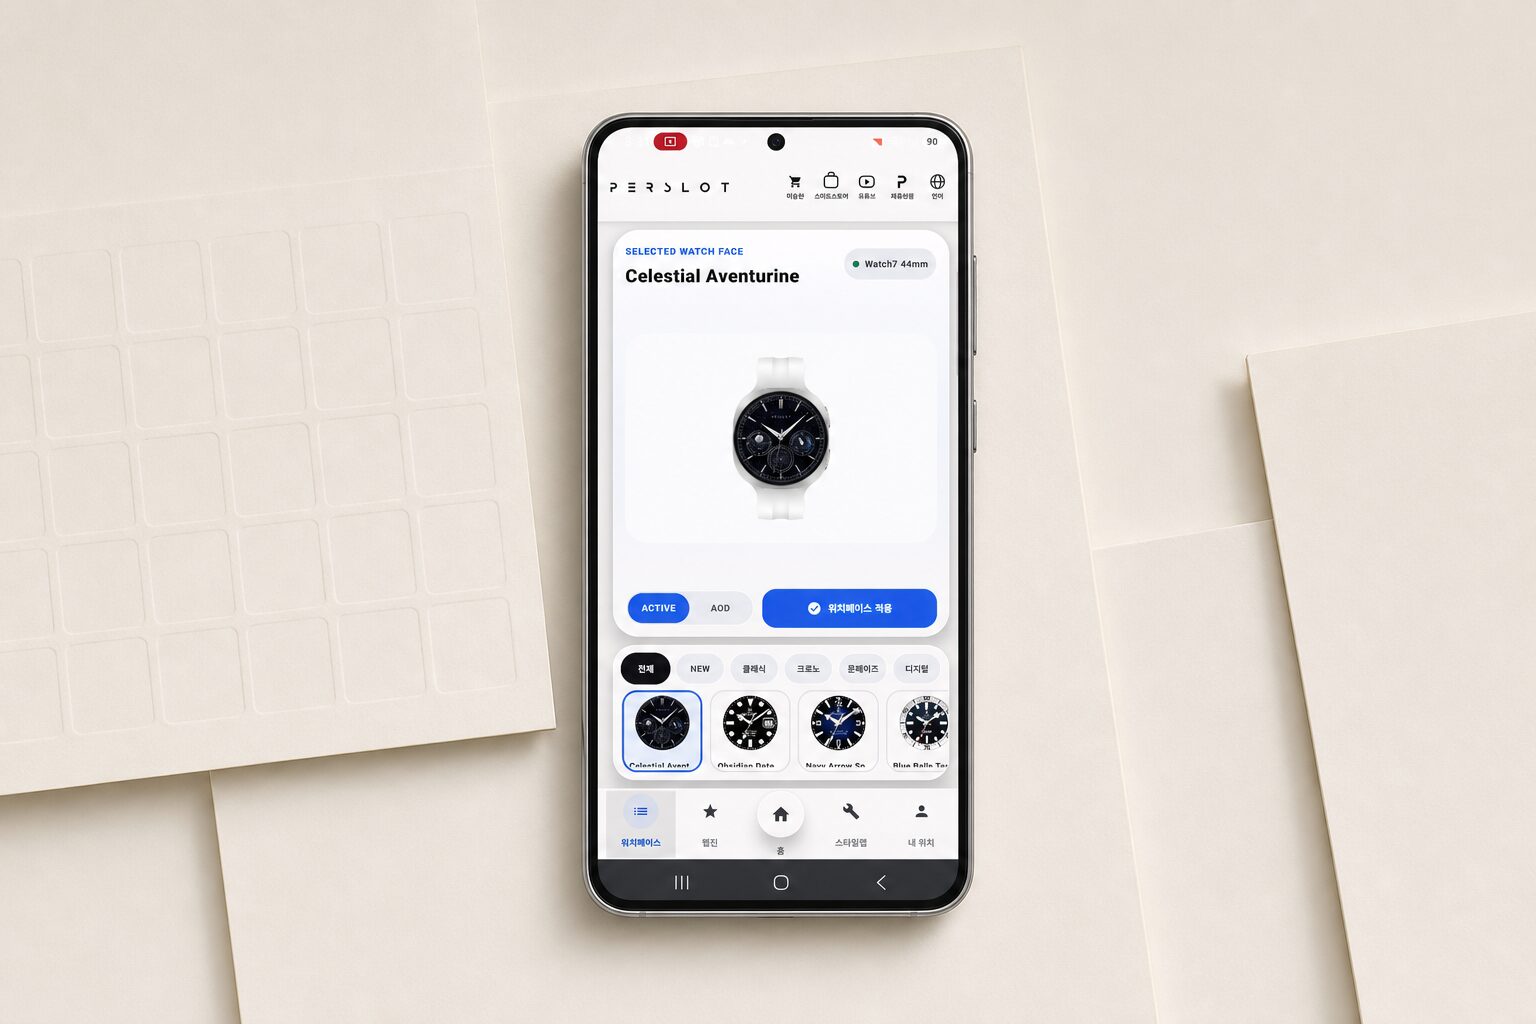



갤럭시워치 베젤링 후기, 부착 전 준비와 중심 정렬
갤럭시워치 베젤링은 부착이 끝난 뒤보다 붙이기 직전의 몇 분이 더 중요합니다. 워치 모델과 크기에 맞는 링을 고르고, 화면 둘레의 유분과 미세한 먼지를 정리한 뒤, 12시와 6시의 중심축을 정확히 잡아야 금속 링이 케이스의 일부처럼 자리 잡습니다. 작은 오차도 원형 디스플레이에서는 네 방향의 여백 차이로 바로 드러납니다.
위치를 맞출 때는 링을 내려놓는 순간부터 세게 누르지 않습니다. 점착 보호지를 제거하기 전에 먼저 본체 위에 가볍게 올려 외경과 버튼 주변 간격을 확인하고, 보호필름을 함께 쓴다면 필름 바깥선이 베젤링 내경과 겹치지 않는지도 살펴야 합니다. 이 건식 맞춤 과정만 거쳐도 잘못된 옵션과 비뚤어진 부착을 상당 부분 피할 수 있습니다.
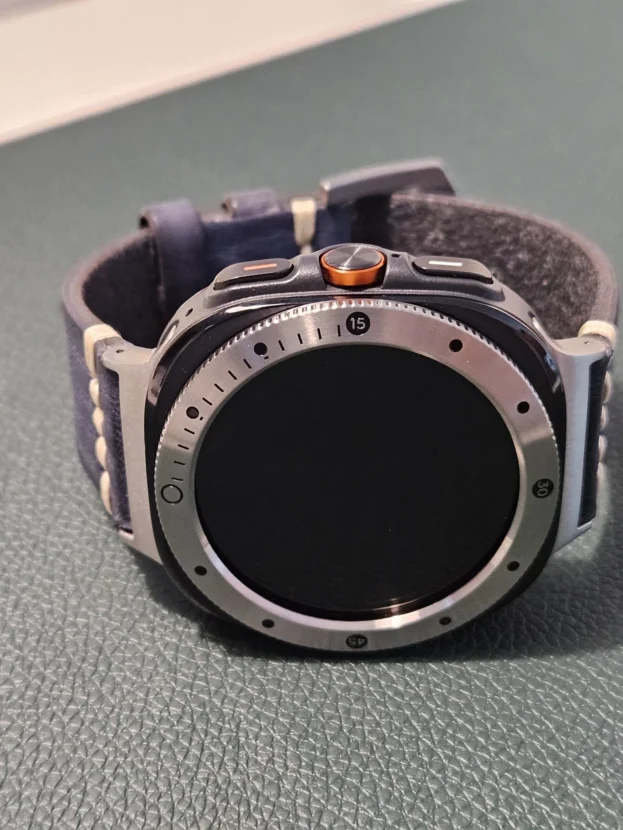
퍼슬랏 베젤링은 디스플레이 중앙을 덮는 풀커버 케이스가 아니라 화면 가장자리의 외곽선을 정리하는 금속 액세서리입니다. 그래서 터치 영역을 넓게 남기면서도 책상 모서리나 문손잡이처럼 일상에서 자주 만나는 접촉으로부터 가장자리 높이를 보완합니다. 보호 범위와 얇은 비율이 함께 살아나려면 호환 규격, 중심 정렬, 점착면 상태가 한 번에 맞아야 합니다.
보호필름도 같은 기준으로 골라야 합니다. 퍼슬랏 베젤링 전용 보호필름은 링의 내경 안으로 들어가도록 설계되지만, 시중 제품이나 삼성 스토어의 일반 전면형 필름은 베젤링 없이 화면을 넓게 덮는 규격입니다. 외곽이 겹치면 링이 필름을 누르거나 점착면이 들뜰 수 있으므로 두 부품의 이름보다 실제로 덮는 범위를 먼저 구분해야 합니다.
배송도 빠르고 좋아요 ㅅ
부착 전 3분이 완성도를 좌우합니다
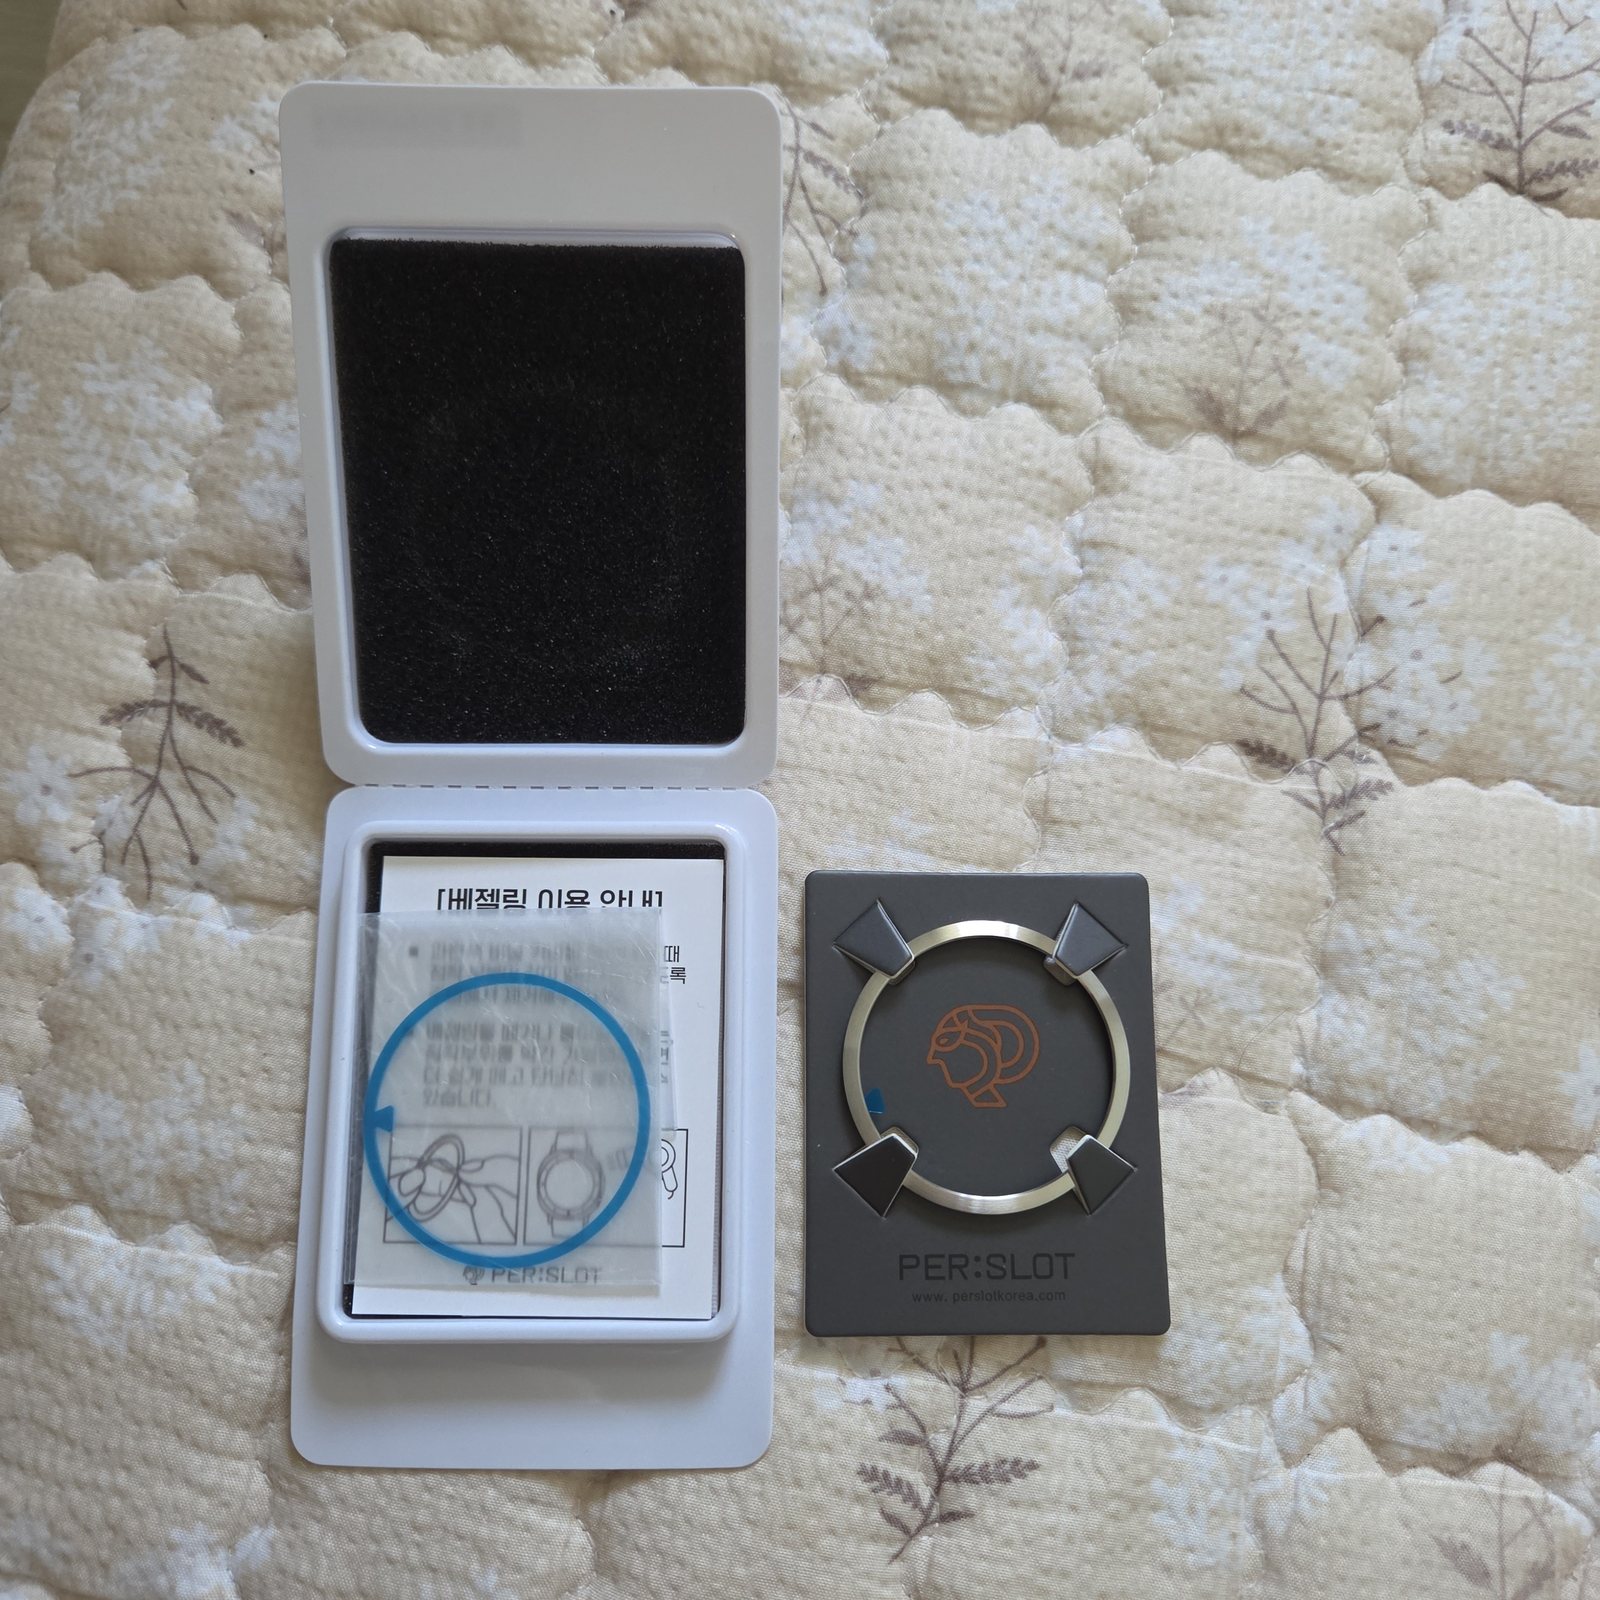
작업할 곳은 밝고 평평해야 합니다. 손을 씻은 뒤 물기를 완전히 말리고, 워치 전원을 끈 상태에서 화면 둘레와 케이스 가장자리를 부드러운 천으로 닦습니다. 패키지 안의 먼지 제거 도구는 보이지 않는 입자를 걷어내는 데 쓰며, 알코올 성분을 사용했다면 표면이 완전히 마를 때까지 기다립니다.
점착 보호지를 벗기기 전에는 베젤링을 본체 위에 한 번 올려봅니다. 12시와 6시, 3시와 9시의 안쪽 간격을 차례로 보고 버튼이나 마이크 주변과 간섭이 없는지 확인합니다. 이 단계에서 링이 한쪽으로 뜨거나 외경이 맞지 않으면 힘으로 눌러 붙이지 말고 워치 모델과 사이즈 옵션부터 다시 확인해야 합니다.
부착면에 손가락이 닿으면 닦아낸 유분이 다시 남을 수 있습니다. 링은 바깥쪽 측면을 잡고 다루며, 점착면을 여러 번 붙였다 떼는 과정도 피합니다. 위치를 충분히 가늠한 다음 한 번에 내려놓는 편이 접착층의 두께와 밀착력을 고르게 유지합니다.

부착했을때 터치는 잘 되요. 근데 정중앙에 맞추기 좀 어려워요. 그리고 스토어에서 구매한 베젤에는 맞지 않네요. 베젤도 같이 구매하실거면 호환여부 확인 먼저하세요.
정중앙을 잡는 네 개의 기준점
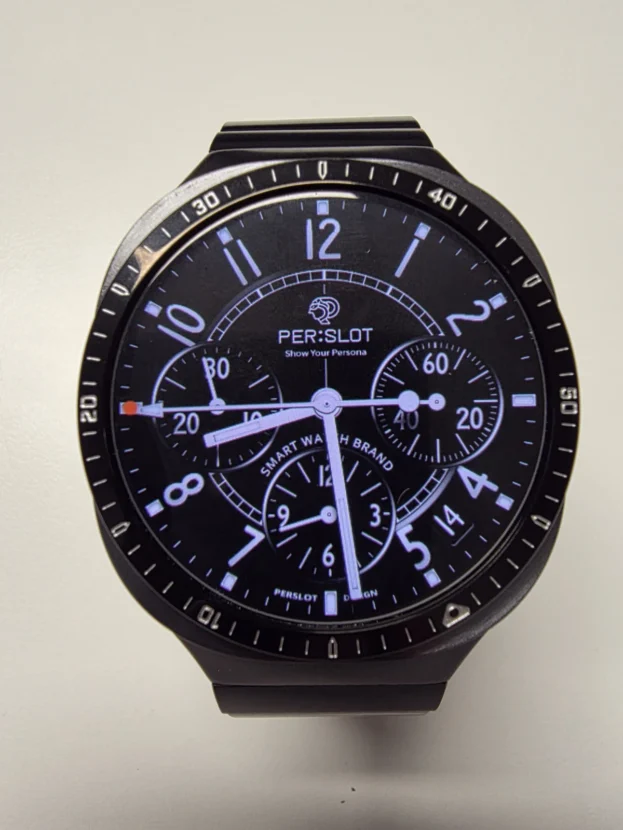
화면에 수직축이 분명한 아날로그 워치페이스를 띄우면 중심을 잡기 수월합니다. 먼저 12시 표시와 링의 위쪽 기준점을 맞추고 6시 방향이 같은 선에 놓였는지 봅니다. 아직 강하게 누르지 않은 상태에서 3시와 9시의 검은 여백을 비교하면 좌우로 치우친 정도를 빠르게 알아볼 수 있습니다.
네 방향이 맞으면 위와 아래를 번갈아 가볍게 눌러 위치를 고정한 뒤, 마지막에 원 둘레를 여러 구간으로 나눠 고르게 압착합니다. 한쪽을 먼저 세게 누르면 반대쪽 간격을 수정하기 어렵습니다. 부착 직후에는 손가락을 화면 끝까지 움직여 터치가 자연스럽게 이어지는지, 측면 버튼을 누를 때 손끝이 링에 걸리지 않는지도 함께 봅니다.
다른 판매처의 베젤링과 필름은 내경과 외경 기준이 다를 수 있습니다. 크기가 비슷해 보여도 결합을 전제로 설계되지 않은 부품끼리는 가장자리가 겹치거나 간격이 과하게 남습니다. 퍼슬랏 베젤링에는 해당 모델과 세대에 맞는 옵션, 그리고 내경에 맞춘 전용 보호필름을 조합하는 것이 정확합니다.

액정 보호 확실히 될거 같아요! 터치도 너무 잘됩니다^^
전면 보호와 터치 영역의 균형
베젤링의 보호는 화면 위를 덮는 방식이 아닙니다. 금속 링이 디스플레이 가장자리에 낮은 높이를 더해 평평한 면과 부딪힐 때 유리가 먼저 닿는 상황을 줄이고, 중앙의 터치 영역은 그대로 열어둡니다. 손가락이 화면 끝에서 안쪽으로 움직이는 제스처도 금속 내경과 충분한 간격이 있어야 자연스럽습니다.
입체적인 인덱스와 홈이 있는 디자인은 전면에서 존재감이 크지만 실제 착용에서는 링의 높이와 바깥 경사가 더 중요합니다. 케이스보다 과도하게 돌출되지 않고 외곽이 부드럽게 이어져야 소매나 가방 안쪽에 걸리는 느낌이 적습니다. 화면이 켜졌을 때뿐 아니라 꺼졌을 때도 네 방향의 원이 고르게 남으면 보호 부품이 따로 얹힌 인상보다 금속 다이얼에 가까워집니다.
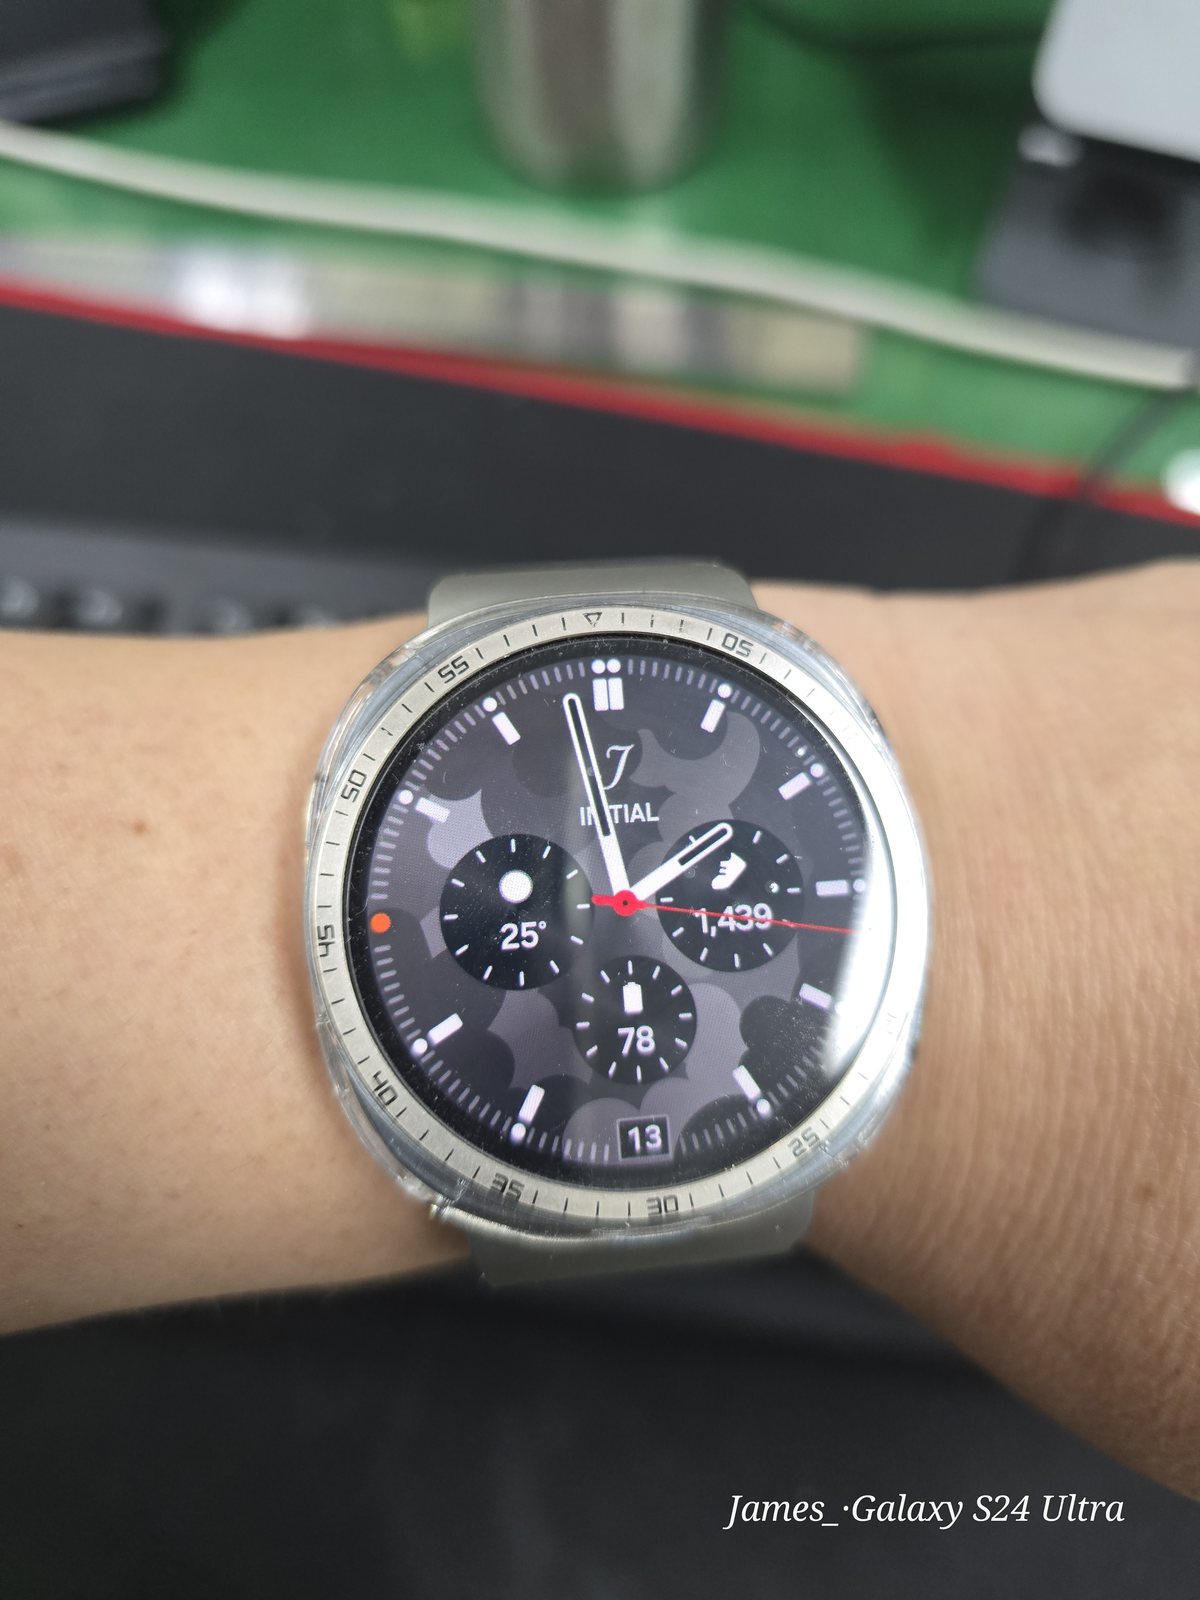
좌,우 움직임이 있어서 버튼 사용에 불편함 빼고는 만족합니다.
움직임이 느껴진다면 결합부터 다시 봅니다
정상적으로 부착된 점착식 베젤링은 손가락으로 가볍게 건드렸을 때 좌우로 돌아가지 않아야 합니다. 움직임이 남는다면 부착면에 유분이나 먼지가 있었는지, 점착 테이프를 반복해 붙였다 떼었는지, 워치 세대와 크기에 맞는 규격인지부터 살펴봅니다. 위치가 어긋난 상태에서 계속 눌러 쓰기보다 분리해 원인을 확인하는 편이 버튼 주변의 불편을 줄입니다.
다시 부착할 때는 남아 있는 점착 잔여물을 정리하고 완전히 마른 면을 준비합니다. 교체용 점착 테이프는 링 바깥으로 튀어나오거나 내경 안으로 말려 들어가지 않도록 원 둘레에 정확히 맞춰야 합니다. 테이프 일부만 겹쳐도 링이 기울어지고, 그 작은 높이 차이가 반대편의 움직임으로 이어질 수 있습니다.
버튼 조작은 베젤링의 바깥선과 손가락이 만나는 위치에 따라 달라집니다. 링이 중심에서 벗어나 버튼 쪽으로 치우치면 누르는 각도가 좁아질 수 있으므로, 3시 방향 간격을 다른 방향과 같은 폭으로 맞추는 것이 중요합니다. 중심이 정확하면 인덱스도 워치페이스의 축과 나란히 놓입니다.

아주 좋습니다. 다른색도 추가구매 해야겠어요. 다만 액정보호 강화유리 사이즈가 살짝 작아서 일체감이 좀 떨어지고 틈사이 먼지 침투 예상됩니다.
보호필름은 외경이 아니라 내경으로 맞춥니다
보호필름과 베젤링을 함께 쓸 때 가장 먼저 볼 치수는 필름의 외경과 링의 내경입니다. 퍼슬랏 베젤링 전용 보호필름은 금속 링 안쪽으로 들어가도록 설계되어 두 부품이 서로 누르지 않습니다. 반면 일반 시중 제품과 삼성 스토어의 전면형 필름은 베젤링이 없는 화면 전체를 기준으로 만들어져 가장자리가 링 아래에 겹칠 수 있습니다.
필름이 지나치게 크면 베젤링 점착면이 충분히 닿지 않고, 가장자리를 누른 압력 때문에 시간이 지나며 들뜸이 생길 수 있습니다. 너무 작은 필름은 화면과 링 사이의 검은 간격을 넓혀 먼지가 눈에 띄기 쉽습니다. 부착 전 필름을 화면 중앙에 맞추고 네 방향의 여백이 일정한지 본 뒤 링을 올리면 실제 간격을 정확히 판단할 수 있습니다.
측면에서 보았을 때 필름이 링보다 높게 솟지 않고 가장자리가 평평하게 붙어 있어야 합니다. 미세한 먼지가 들어갔다면 억지로 밀어내기보다 필름을 천천히 들어 제거 도구로 걷어냅니다. 링을 이미 강하게 누른 뒤 필름을 밀어 넣는 방식은 두 점착면을 동시에 건드릴 수 있어 권하지 않습니다.

잘 받았습니다 살짝 큰 느낌은 있지만 이뻐서 그냥 써야겠어요 아무튼 써봐야 겠내요 한달 뒤 다시 올리겠습니다
부착 직후보다 하루 뒤가 더 중요합니다
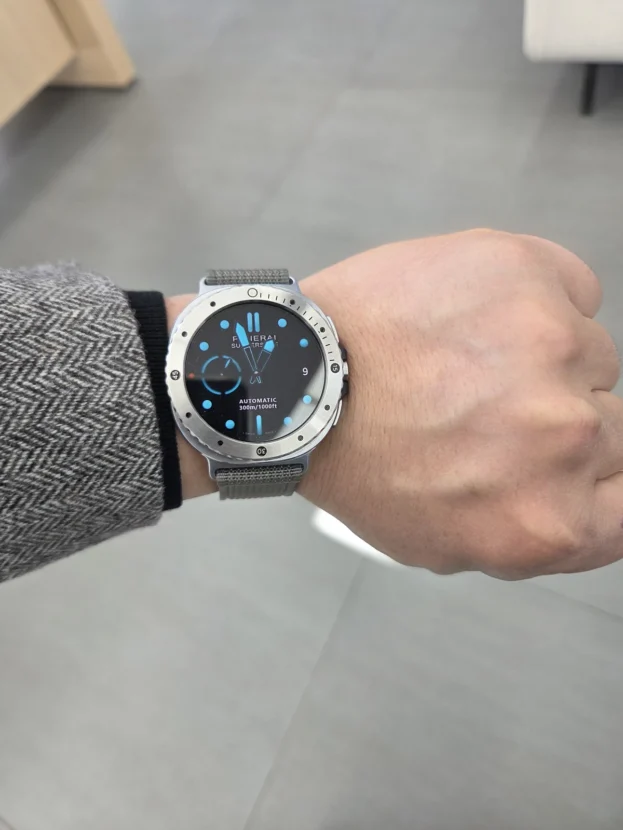
인덱스가 선명한 베젤링은 금속 폭이 눈에 잘 들어와 처음에는 본체가 조금 크게 느껴질 수 있습니다. 화면을 켰을 때는 워치페이스와 인덱스가 이어지고, 화면이 꺼지면 금속 링의 외경과 케이스 비율이 또렷해집니다. 손목 둘레와 스트랩 폭에 따라 체감이 달라지므로 정면뿐 아니라 측면과 소매 안쪽에서의 높이도 함께 보는 편이 좋습니다.
압착을 마친 뒤에는 최소한 초기 점착이 안정되는 동안 물, 땀, 사우나처럼 수분과 온도 변화가 큰 환경을 피합니다. 다음 날 원 둘레를 살펴 들뜬 구간이 없는지, 버튼 쪽 간격이 달라지지 않았는지 확인합니다. 세척할 때는 링 안쪽을 날카로운 도구로 긁지 말고 부드러운 마른 천으로 표면과 가장자리를 가볍게 닦습니다.
한 달 뒤에도 볼 부분은 중심과 점착, 표면 상태입니다. 미세한 움직임이나 필름 들뜸이 없다면 결합이 안정된 것이고, 땀과 물자국을 제때 닦아주면 금속의 반사와 각인도 깔끔하게 유지됩니다. 디자인의 만족감은 첫인상에서 시작하지만 오래 쓰는 완성도는 정확한 규격과 부착 상태에서 결정됩니다.
작은 오차가 사라질 때 완성되는 금속선
갤럭시워치 베젤링은 화면의 기능을 바꾸지 않지만 손목 위에서 보이는 원의 비율을 분명하게 바꿉니다. 정확한 모델과 사이즈, 깨끗한 부착면, 네 방향의 중심이 맞으면 링은 별도의 장식보다 워치 케이스에 이어진 금속 부품처럼 보입니다. 터치 영역은 열어두고 가장자리에는 낮은 높이를 더하는 구조라 일상적인 사용감과 외관을 함께 다듬을 수 있습니다.
보호필름을 함께 사용할 때는 호환이라는 표현만 보지 말고 실제 외경과 내경의 관계를 확인해야 합니다. 퍼슬랏 전용 필름은 베젤링 안쪽 규격을 기준으로 설계되어 있으며, 베젤링 없이 전면을 덮는 일반 필름과 구조가 다릅니다. 필름을 먼저 중앙에 붙이고 금속 링을 그 바깥에 맞추면 두 점착면이 겹치지 않고 화면 가장자리의 간격도 고르게 남습니다.
부착을 마친 뒤에는 하루 동안 수분과 큰 충격을 피하고, 이후에는 원 둘레의 들뜸과 좌우 움직임을 가끔 살피면 됩니다. 중심이 흐트러지지 않고 표면이 고르게 유지되면 플레인, 인덱스, 입체적인 스타일 모두 각자의 선을 또렷하게 남깁니다. 오래 보기 좋은 베젤링은 화려한 각인보다 정확히 맞는 한 개의 원에서 시작됩니다.
Preparing And Aligning A Galaxy Watch Bezel
The few minutes before installation have a greater effect on the finished result than the final press itself. The bezel must match the exact watch model and size, and the case edge must be free from oil, moisture and fine dust. A circular display makes small errors visible immediately because the clearance changes in all four directions.
Before removing the adhesive liner, place the ring lightly over the watch and compare the outside diameter, the button-side clearance and the alignment at twelve, six, three and nine o’clock. If a screen protector is already fitted, its outside edge must remain inside the bezel’s inner diameter. This dry fitting step prevents a wrong option or an off-centre installation from being pressed into place.
A PERSLOT bezel is a metal accessory that defines the outer edge of the display rather than a full-cover case that covers the watch. It leaves the central touch area open while adding a low metal boundary around the more exposed perimeter. Compatibility, alignment and an even adhesive surface must work together for that balance to remain clean.
PERSLOT bezel-specific screen protectors are cut to fit inside the metal ring. General full-face films from other retailers or Samsung stores are designed for a bare display without a bezel, so their edges may overlap the ring. The actual coverage area, rather than the shared name of screen protector, determines whether the two parts can be used together.
Three Minutes Of Preparation
Delivery was fast and I like it.
Work on a bright, flat surface. Wash and dry your hands, switch the watch off and wipe the display perimeter and case edge with a soft cloth. Use the supplied dust-removal materials for particles that are difficult to see. If an alcohol-based wipe has been used, wait until the surface is completely dry.
Place the bezel over the watch before exposing the adhesive. Compare the inner clearance at twelve, six, three and nine o’clock and check for interference around the button and microphone areas. A ring that lifts on one side or does not match the case diameter should not be forced into position; recheck the model and size option first.
Hold the ring by its outer side so that fingers do not touch the cleaned adhesive surface. Repeatedly attaching and lifting the tape can stretch or contaminate it. Establish the position carefully, then lower the ring once so the adhesive layer remains level.
Four Reference Points For Accurate Centring
Touch works well after installation. It is a little difficult to centre it precisely. It also does not fit a bezel purchased from another store, so check compatibility first if you plan to buy both.
Display an analogue watch face with a clear vertical axis. Align the upper reference point with twelve o’clock, then check that six o’clock sits on the same line. Before applying pressure, compare the black clearance at three and nine o’clock to identify any sideways shift.
When all four directions are even, press the upper and lower sections lightly to hold the position. Finish by dividing the circumference into several sections and applying even pressure. Pressing one side firmly at the beginning makes the opposite clearance difficult to correct. After installation, move a finger around the screen edge and operate the side buttons to confirm natural touch and access.
Bezels and films from different suppliers can use different inside and outside dimensions. Components that appear similar may overlap or leave excessive space when they were not designed as a pair. Match the PERSLOT bezel to the exact watch generation and size, then use the corresponding bezel-specific protector when film is required.
Protection Without Closing The Touch Area
The screen feels well protected, and touch works very well too.
A bezel protects by adding a low metal height around the perimeter, not by covering the display. On a flat contact surface, this boundary can reduce the chance that the glass edge meets the object first, while the central touch area remains open. The inner diameter also needs enough clearance for gestures that begin at the edge of the screen.
Three-dimensional indices and grooves create a strong visual presence, but the outer slope and overall height matter just as much in use. A bezel that follows the case without excessive projection is less likely to catch on sleeves or the inside of a bag. Even circular clearance with the screen on and off makes the part look closer to a metal dial than an object placed on top of the watch.
What To Check When The Ring Moves
There is some movement from side to side, which makes the buttons less convenient, but otherwise I am satisfied.
A correctly installed adhesive bezel should not rotate from side to side under light finger pressure. If movement remains, inspect the surface for oil or dust, consider whether the tape was repeatedly lifted, and confirm that the bezel matches the exact generation and case size. Removing and identifying the cause is preferable to continuing to press a misaligned ring into place.
Before reinstallation, remove adhesive residue and prepare a fully dry surface. Replacement tape must follow the circumference without extending outside the ring or curling into the inner diameter. Even a small overlap can tilt the ring and create movement on the opposite side.
Button access also depends on the bezel’s position. A ring shifted toward the button side narrows the angle available to a fingertip. Equal clearance at three o’clock and the other reference points keeps the controls accessible and aligns the bezel indices with the watch face.
Matching The Protector To The Inner Diameter
It is very good, and I would like to buy another colour. The tempered-glass protector feels slightly small, however, so the integration is not quite as complete and dust may enter the gap.
When a screen protector and bezel are used together, compare the protector’s outside diameter with the bezel’s inside diameter. PERSLOT bezel-specific protectors are designed to sit within the metal ring. General products and Samsung-store full-face films cover a broader bare display and can overlap the adhesive area beneath a bezel.
A protector that is too large can prevent the ring from adhering evenly, while a protector that is noticeably small leaves a wider dark gap where dust becomes visible. Centre the film first, compare its clearance in four directions and then place the ring over it. This order gives a clear view of the actual spacing before the metal is pressed down.
From the side, the protector should not stand above the bezel and its perimeter should remain flat. If fine dust is trapped, lift the film gradually and remove the particle with the appropriate tool. Do not force a protector under a bezel that has already been pressed firmly into place.
The Day After Installation
It arrived safely. It feels slightly large, but it looks good, so I will keep using it. I will see how it goes and post again after a month.
An indexed bezel has a visible metal width and can make the watch feel larger at first. With the display on, its markers connect with the watch face. With the display off, the ring’s outside diameter and the case proportion become more apparent. Check the side profile and the way it sits beneath a sleeve as well as the front view.
After applying even pressure, avoid water, sweat, steam and large temperature changes while the adhesive begins to settle. On the following day, inspect the circumference for a lifted section and confirm that the clearance near the buttons has not changed. Clean the surface and edge with a soft, dry cloth rather than a sharp tool.
After longer use, centring, adhesion and surface condition remain the useful points to monitor. If there is no movement or film lift, the assembly has remained stable. Wiping away sweat and dried water marks promptly preserves the reflection and engraving. Long-term finish begins with the correct dimensions and a precise installation.
A Metal Circle Finished By Accuracy
A Galaxy Watch bezel does not alter the watch’s digital functions, but it changes the visible proportion of the dial. When the model, size, clean surface and four reference points are correct, the ring appears connected to the case rather than added as a separate decoration. Its open centre retains touch access while the low perimeter refines both protection and appearance.
When a protector is used, compatibility must be judged by the relationship between outside and inside diameters. PERSLOT bezel-specific films are designed around the inner dimensions of the ring, unlike general full-face films made for an uncovered display. Centre the film first and align the metal ring around it so the two adhesive surfaces do not compete.
Keep the watch away from moisture and heavy impact immediately after installation, then inspect the circumference occasionally for lifting or lateral movement. When the centre remains stable and the metal surface is kept clean, plain, indexed and sculpted bezel designs all retain their intended geometry. A convincing bezel begins with one accurately placed circle.
추가 정보
베젤링을 부착하기 전에 확인할 항목
갤럭시워치 베젤링의 완성도는 링의 디자인뿐 아니라 워치 규격, 부착면의 상태, 네 방향의 중심과 보호필름 간격에서 결정됩니다. 아래 항목을 순서대로 확인하면 비뚤어진 외곽선, 버튼 간섭과 점착 들뜸을 줄일 수 있습니다.
- 설정 메뉴나 본체 뒷면에서 갤럭시워치 모델과 케이스 크기를 먼저 확인합니다.
- 표면의 먼지, 유분과 수분을 닦고 완전히 마른 상태에서 작업합니다.
- 점착 보호지를 제거하기 전에 베젤링을 올려 외경과 버튼 간격을 비교합니다.
- 12시와 6시의 수직축을 먼저 맞춘 뒤 3시와 9시의 안쪽 여백을 확인합니다.
- 네 방향이 같아진 뒤 원 둘레를 여러 구간으로 나눠 고르게 압착합니다.
- 화면 가장자리의 터치와 측면 버튼 조작이 자연스러운지 바로 점검합니다.
- 보호필름은 필름 외경이 베젤링 내경 안으로 들어가는 전용 규격을 사용합니다.
- 초기 점착이 자리 잡는 동안 물, 땀, 사우나와 큰 온도 변화를 피합니다.
자주 묻는 질문
갤럭시워치 베젤링은 어느 순서로 붙이나요?
모델과 크기를 확인한 뒤 화면 둘레를 닦고 완전히 말립니다. 보호지를 떼기 전 베젤링을 가볍게 올려 네 방향의 간격을 확인하고, 위치가 정확할 때 점착면을 노출해 한 번에 내려놓습니다. 위와 아래를 먼저 고정한 뒤 원 둘레를 고르게 눌러 마무리합니다.
중앙을 맞추기 어려울 때 어떤 워치페이스가 좋나요?
12시와 6시의 수직선이 분명하고 바깥 여백이 단순한 아날로그 워치페이스가 편합니다. 위아래 축을 먼저 맞춘 다음 3시와 9시의 검은 간격을 비교하면 좌우 치우침을 쉽게 찾을 수 있습니다.
부착한 베젤링이 좌우로 움직여도 괜찮나요?
점착식 베젤링은 가볍게 건드렸을 때 돌아가지 않는 상태가 정상입니다. 움직임이 남는다면 규격 불일치, 표면의 유분과 먼지, 반복 부착으로 약해진 테이프를 점검합니다. 억지로 눌러 쓰기보다 분리해 원인을 확인하고 새 점착면으로 다시 맞춥니다.
베젤링을 붙이면 화면 터치가 불편해지나요?
정확한 모델용 베젤링이 중앙에 부착되면 디스플레이 중앙과 화면 가장자리의 터치 영역은 열려 있습니다. 부착 후에는 가장자리에서 안쪽으로 움직이는 제스처와 측면 버튼을 직접 확인해 링이 한쪽으로 치우치지 않았는지 살펴봅니다.
일반 강화유리와 함께 사용할 수 있나요?
일반 전면형 강화유리와 필름은 베젤링 없이 화면을 넓게 덮는 규격이라 링의 내경과 겹칠 수 있습니다. 퍼슬랏 베젤링 전용 보호필름은 금속 링 안쪽으로 들어가도록 설계되어 있으므로, 두 부품을 함께 쓸 때는 전용 규격을 구분해야 합니다.
보호필름과 베젤링 중 무엇을 먼저 붙이나요?
보호필름을 화면 중앙에 먼저 맞추고 가장자리의 들뜸과 먼지를 확인한 뒤 베젤링을 올립니다. 필름 외곽과 링 내경의 간격을 네 방향에서 비교할 수 있어 두 부품이 겹치는 일을 줄일 수 있습니다.
부착 직후 바로 운동해도 되나요?
초기 점착이 안정되기 전에는 땀과 수분, 큰 온도 변화를 피하는 편이 좋습니다. 부착한 날은 원 둘레가 고르게 눌렸는지 확인하고, 다음 날 들뜸이나 좌우 움직임이 없는지 다시 살펴봅니다.
베젤링을 오래 깨끗하게 쓰는 방법은 무엇인가요?
운동이나 외출 뒤에는 땀과 물자국을 부드러운 마른 천으로 닦습니다. 각인 홈과 링 안쪽은 날카로운 금속 도구로 긁지 않고 결이 고운 브러시를 사용합니다. 강한 연마제는 표면 결이나 코팅을 바꿀 수 있어 피합니다.
부착 완성도를 높이는 세부 기준
모델과 사이즈
같은 갤럭시워치라도 세대와 케이스 크기에 따라 화면 지름, 버튼 위치와 가장자리 형상이 달라집니다. 외형이 비슷하다는 이유로 다른 규격을 붙이면 한쪽이 뜨거나 버튼 방향의 간격이 좁아질 수 있습니다. 상품 옵션의 모델명과 케이스 크기를 본체 정보와 정확히 맞춥니다.
점착면과 압착
점착층은 깨끗하고 평평한 면에서 가장 고르게 붙습니다. 링을 반복해 들어 올리거나 한쪽부터 강하게 누르면 테이프가 늘어나 높이가 달라질 수 있습니다. 위치를 충분히 맞춘 뒤 여러 구간을 번갈아 눌러 원 둘레에 같은 압력을 줍니다.
터치와 버튼 여백
부착이 끝나면 화면 네 모서리와 가장자리를 손가락으로 움직여 터치가 끊기지 않는지 봅니다. 버튼을 누를 때 손끝이 금속 링에 걸린다면 링이 버튼 쪽으로 치우쳤는지 확인합니다. 중심이 정확할수록 화면과 버튼 모두 원래 조작 범위를 유지합니다.
보호필름의 덮는 범위
보호필름은 이름이 같아도 외경이 다릅니다. 전면형 제품은 베젤링 없는 화면을 넓게 덮고, 퍼슬랏 전용 필름은 베젤링 내경 안에 자리 잡습니다. 필름과 링을 함께 사용할 때는 두 점착면이 겹치지 않고 네 방향의 검은 여백이 고른지 확인합니다.
모델과 크기별 베젤링 및 전용 보호필름은 퍼슬랏 공식몰에서 구분할 수 있습니다. 중심 정렬과 압착 과정을 영상으로 확인하려면 퍼슬랏 공식 유튜브를 함께 참고할 수 있습니다.